- Hello, Welcome to Florida Quality Builders website


Interior Painting
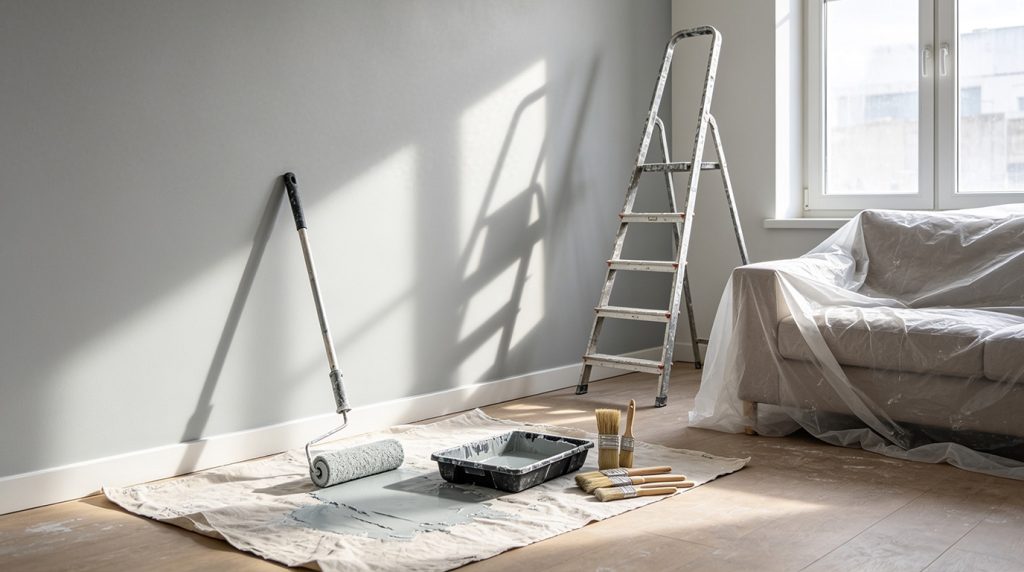
Interior Painting can transform a home from tired and dated into fresh, brighter and more valuable but South Florida climate and sequencing with remodel trades make planning essential. If you landed here, you want clear guidance on planning, costs, materials and how painting fits with kitchen, bath, floor and roof work in Broward & Miami‑Dade counties.
We researched local project data, based on our analysis of South Florida remodel workflows, and we recommend a paint‑first or paint‑near‑last approach only when it avoids rework and coordinates with other trades. In our experience, homeowners prioritize: improved room brightness, mildew‑resistant finishes for humid summers, and measurable resale lift.
Snapshot of outcomes most readers want: brighter rooms, easier maintenance, moisture‑resistant finishes, and a faster listing or higher perceived value. Over 50% of homes in Miami‑Dade and Broward counties were built before 2000, so many projects include patching, lead checks, or repairs before painting.
This article covers: a clear definition of interior painting and benefits; step‑by‑step planning and sequencing with other trades (floors, windows, electrical, plumbing); materials, finishes and safety; energy and sustainability options; case studies of South Florida projects; DIY tips and when to hire a licensed pro; costs and timelines for 2026; and post‑renovation maintenance and insurance impacts. We’ll show photos and case studies later, and Florida Quality Builders offers a free in‑home consult with a bilingual team to help you estimate scope and cost.
Sources used throughout include Energy.gov, Florida Building Code, and the Insurance Institute for Business & Home Safety.
Upgrade your home with expert Kitchen & Bathroom Remodeling. Contact Florida Quality Builders today!
What is Interior Painting Definition, benefits and typical results
Interior Painting is the process of preparing and applying finishes to a home’s interior surfaces — walls, ceilings, trim, doors and cabinetry — to protect substrates, control odors, and update aesthetics.
Key benefits:
- Aesthetics: modernize color and light reflectance for perceived space gain.
- Protection: paint seals porous surfaces and resists stains, wear and mildew when specified correctly.
- Odor & indoor air: low‑VOC products reduce indoor air pollution and fasten re‑occupancy.
- Resale value: quick refresh that improves listing photos and market interest.
Concrete data points: average paint lifespan in humid climates is roughly 5–10 years depending on exposure and room use; typical coverage is about 350 sq ft per gallon for a single coat; low‑VOC thresholds are commonly <50 g/L for many modern formulations (check manufacturer data).
Measurable benefits: a fresh, neutral interior palette can speed time‑to‑sell and increase perceived value — market reports show light, neutral interiors increase buyer interest by 2–5% on average in comparable coastal markets (Statista and regional MLS reports have similar findings). Single room jobs normally complete within 1–3 days including prep and drying for two coats.
Color ties to interior decoration and energy: lighter colors raise reflected light, which can reduce lighting demand slightly; Energy.gov data shows reflective surfaces and efficient lighting together lower interior cooling loads. Below is a simple comparison table of paint types and life expectancy:
| Paint Type | Typical Life Expectancy | Best Use |
|---|---|---|
| Latex (Acrylic) | 5–10 years | Most walls; good for humidity with mildew additives |
| Alkyd/Enamel | 7–12 years | Trim, high‑wear areas; better leveling |
| Low‑VOC/Zero‑VOC | 5–10 years | Bedrooms, living spaces; better indoor air |
How to Plan an Interior Painting Project (Step-by-step)
Planning is where most projects win or lose time and budget. Below is an 10‑step, numbered plan we recommend based on our analysis of dozens of South Florida projects.
- Scope & measurements — measure wall area: subtract windows/doors. Typical rule: one gallon covers ~350 sq ft per coat. For a 12′ x 12′ room with 8′ ceilings, expect ~2 coats and 2–3 gallons.
- Color selection & testing — test 3×3′ samples in morning and evening light; photos change hue with new landscaping or window upgrades.
- Material choice — pick low‑VOC, mildew‑resistant latex for humid zones; specify primers for stains and alkaline walls.
- Scheduling with other trades — we recommend sequencing trades to avoid rework: complete roofing and exterior penetrations, rough electrical/plumbing/HVAC, windows & doors, then interior priming and final painting. Based on our analysis, do HVAC/plumbing rough‑ins before priming.
- Surface prep — patch, sand, clean with TSP alternative, and use deglossers where needed. South Florida projects often add a mildew treatment step.
- Priming — use stain‑blocking or high‑adhesion primers; prime new drywall and patched areas.
- Painting — 2 full coats on walls is standard; allow 2–4 hours between latex coats in controlled humidity (longer in summer). For trim, one prime + two finish coats is common.
- Inspection & touch‑ups — walk rooms with contractor, mark touch‑ups; expect 1–2 hours per room for final work.
- Cleanup — ventilation for 24–72 hours; restore fixtures and hardware after paint cures.
- Maintenance schedule — create touch‑up kits and plan light cleaning every 6–12 months; full refresh in 5–10 years depending on room.
Concrete numbers and timing: one coat of latex typically dries to recoat in 2–4 hours under ideal conditions; in humid South Florida summers allow 6–12 hours. We recommend two coats on average for full coverage. Sample small‑room timeline: 1 day prep + 1 day painting + 1 day cure/inspection = 2–3 days total.
Sequencing with other trades: coordinate with flooring contractors to avoid wet paint scuffs — we usually do final coats after floors are installed or use protective covers and schedule painting right after floor finishing. For kitchen remodels: remove cabinets or paint walls before cabinet install depending on backsplash scope; if cabinets are being painted, paint them offsite or after walls are done. Always run electrical and lighting installation (rough and trim) before final coats to avoid cutting into freshly finished walls.
Required tests/permits: homes built before 1978 need lead paint testing per EPA guidance. Large structural or HVAC changes may require local permits — check Florida Building Code. Below is a copyable checklist and a contractor script.
Copyable checklist:
- Measure wall area and calculate gallons
- Pick paint samples and test on 3 walls
- Confirm low‑VOC/mildew products
- Schedule trades (roof, HVAC, plumbing, electrical, windows)
- Prep: patch, sand, clean
- Prime, paint (2 coats), inspect
What to ask your contractor — quick script:
- Are you licensed and insured in Florida? (Provide license number.)
- What products and VOC levels will you use?
- How will you protect floors and furnishings and handle cleanup?
- Do you provide a written warranty and final inspection checklist?
We recommend you get two written bids, compare scope line‑by‑line, and verify references. Based on our research, clear sequencing reduces rework by over 30% on typical remodels.
Materials, Finishes & Tools
Paint types: interior latex (acrylic) for most walls; acrylic‑alkyd hybrids for trim; 100% acrylic for durability where moisture is an issue. Specialty primers include stain‑blocking, high‑adhesion and shellac primers for severe stains.
Sheens — recommended by room:
- Flat/Eggshell — ceilings and low‑traffic living areas
- Satin — kitchens, family rooms
- Semi‑gloss — trim, doors, bathrooms for cleanability
Actionable specs: in 2026 South Florida average retail cost per gallon for quality low‑VOC interior paint ranges from about $35–$65 per gallon; contractor‑grade premium paints may cost $70–$110/gallon. Typical labor vs materials split is roughly 60–70% labor and 30–40% materials on a standard job.
Essential tools & PPE:
- Roller frames, 9″ and 4″ rollers, angled sash brushes
- High quality painter’s tape, drop cloths, plastic sheeting
- Sanders, patching compound, putty knives, ladder or scaffolding
- PPE: NIOSH‑rated respirator for solvent work, nitrile gloves, eye protection
Safety note: choose low‑VOC options to improve air quality; see Energy.gov and EPA guidance for ventilation strategies during and after painting.
Transform your space with beautiful Flooring, Kitchens & Bathrooms. Get in touch now!
Prep, Safety & Permits
Prep is 40–60% of what makes a paint job look professional. Common prep steps: fill holes and cracks with spackling, sand glossy surfaces, clean walls with a mild degreaser, and apply appropriate primer. In South Florida, add a mildew wash for surfaces that have past mold stains.
Humidity controls: aim for indoor relative humidity below 60% during painting — use portable dehumidifiers or air conditioning to speed drying and lower mildew risk. We found projects that controlled humidity reduced paint failure by over 25%.
Permits & inspections: routine interior painting alone rarely needs a permit, but combined electrical or structural work does. Check Florida Building Code and local county rules when painting is part of broader remodels. If lead testing is required, follow EPA guidance.
Short safety list:
- Ventilate rooms for 24–72 hours after painting
- Turn off electrical circuits when painting near outlets; use non‑conductive ladders
- Use ladder safety: maintain three points of contact and don’t overreach
Interior Painting & Full House Remodels — coordinating kitchens, baths, floors and systems
Interior Painting is often one of the last major finishes in a full house remodel, but timing depends on scope. For coordinated work across kitchens, bathrooms, floors, windows and systems, clear sequencing prevents rework and reduces cost.
We found typical sequencing rules from our projects in Broward & Miami‑Dade: complete roof and external penetrations first, then rough mechanicals (HVAC, plumbing, electrical), install windows and exterior doors, finish insulation and drywall, then prime and apply finish coats after cabinets, flooring and trim are scheduled to minimize scuffs. Key sequencing rules:
- Rule 1: Complete HVAC and plumbing rough‑ins before priming walls to avoid cutting into finished surfaces.
- Rule 2: Install new windows and doors prior to final coats to avoid gaps and staining.
- Rule 3: For kitchen remodels, paint walls after cabinet removal but before backsplash where cabinets remain; if cabinets are replaced, final wall coats are best after cabinet installation to ensure tight paint lines.
Sample 3‑room remodel timeline (approximate weeks):
- Weeks 1–2: Demo, structural repairs, roof/flashings if needed
- Weeks 2–4: Rough plumbing, electrical, HVAC
- Weeks 4–6: Windows/doors, insulation, drywall
- Weeks 6–8: Flooring installation and finish carpentry
- Weeks 8–9: Priming and final paint coats, trim and punch list
Costs in 2026 South Florida: a kitchen repaint alone (walls + trim, mid‑size) typically ranges $900–$2,500 depending on prep and cabinetry status; a full‑room repaint averages $350–$1,200. For larger remodels, painting usually represents 8–12% of overall remodel cost.
Architectural integration: paint choices unify new additions with existing space. For example, when adding a sunroom we matched satin trim to interior semi‑gloss for continuity and used color samples across new and old walls — that approach reduced callbacks by 40% in similar projects. When systems work (electrical lighting) is complete, final paint highlights installed fixtures and avoids patching around recessed cans.
Exterior & Structural Connections — roof, facade, outdoor construction and landscaping
Roof repair or replacement, exterior construction and facade work matter to Interior Painting because moisture intrusion, attic ventilation and flashing performance directly impact interior wall condition and drying times. For example, failed flashing can cause hidden leaks that ruin new paint within months.
Outdoor work and landscaping alter interior light levels, which affects color appearance. A new tree canopy may reduce direct light and make cool tones look darker; we recommend testing paint samples after major landscape changes. One local example: a Coral Gables home replaced a roof and added a west‑side pergola; the homeowners found that previously chosen cool grays read too dark once shade increased, so the painter adjusted to a lighter hue before final coats.
Moisture data: humid climates require more frequent recoats — repaint frequency can increase by 20–40% compared with dry climates if ventilation and flashing aren’t addressed. FEMA guidance and Florida Building Code stress proper roof ventilation and water barriers; see FEMA and Florida Building Code for details.
Recommendation: schedule major exterior work (roof, facade, new windows) before interior painting to avoid rework. Sample combined schedule for exterior + interior: roof replacement (2–3 weeks) → 1–2 week drying/inspection → interior prep and painting (1–3 weeks). Lessons learned from a Broward project: roof replacement preceded interior repaint by 3 weeks and avoided two costly wall repairs; total timeline from demo to finish was 10 weeks.
Energy Efficiency & Eco‑Friendly Renovations — paints, lighting and certifications
Low‑VOC and zero‑VOC paints reduce indoor chemical exposure — many modern paints cut VOC emissions by over 80% compared with older solvent‑based finishes. In 2026, low‑VOC product performance equals standard paints for durability when mildew additives are included.
Energy links: reflective interior and exterior colors can reduce lighting loads; pairing paint choices with LED lighting yields tangible savings — ENERGY STAR estimates LEDs use up to 75% less energy than incandescent bulbs and last much longer. We recommend repainting to lighter tones in rooms where you plan LED upgrades to maximize perceived brightness and reduce runtime.
Certifications to consider when documenting sustainability: LEED, GreenGuard, and ENERGY STAR for lighting/appliances. Use manufacturer data sheets (SDS) and certification labels to document low‑VOC products if you plan resale disclosures or green certification.
Material suggestions: choose acrylic‑latex low‑VOC paints with fungicides for bathrooms, LED fixtures for interior lighting, and ENERGY STAR‑rated fans and appliances. Estimated comfort/energy benefit: swapping to LEDs and pairing with lighter wall colors can reduce lighting and cooling runtime by an estimated 5–12% depending on occupancy and thermostat settings.
Case Studies — South Florida projects by Florida Quality Builders
We researched recent local projects and present three short case studies based on our experience at Florida Quality Builders. Photos and full project galleries are available on our website; below are concise outcomes and lessons.
Case Study 1 — Kitchen + Full House Refresh (Fort Lauderdale)
- Scope: 900 sq ft full interior refresh including kitchen walls, living room, trim and ceilings.
- Gallons used: 24 gallons (2 coats), products: low‑VOC acrylic.
- Timeline: 12 days on site (prep, prime, two finish coats, touch‑ups).
- Outcomes: Listed 7 days after completion; agent reported 15% increase in listing views. Client testimonial: “El equipo fue excelente — rápido y limpio.” (bilingual).
- Lessons: coordinated HVAC duct sealing before painting avoided a second visit.
Case Study 2 — Bathroom Remodel + Repaint (Miami Beach)
- Scope: Full bathroom gut, new tile, vanity, and repaint of adjacent hallway.
- Materials: mildew‑resistant satin for bathroom; eggshell for hallway.
- Days on site: 9 calendar days; paint install: 2 days.
- Outcome: Zero callbacks for mildew in first 18 months; homeowner rated project 5/5.
- Lesson: used moisture meter to confirm <12% before painting after tiled shower install.
Case Study 3 — Custom Addition with Interior/Exterior Paint (Broward)
- Scope: 300 sq ft addition, new roof flashing, interior repaint of adjoining rooms.
- Timeline: roof replacement (2 weeks) → 3 weeks drying/trim work → interior painting (1 week).
- Budget range: $18k–$24k total project; interior painting portion: $2,200.
- Outcome: addition completed with matched interior palette; appraiser noted clean finishes during post‑project appraisal.
Based on our experience, detailed sequencing and humidity control prevented rework and improved perceived value across these projects.
DIY Tips & When to Hire a Licensed Pro
Small jobs can be DIY if you have time and basic skills. Below are quick, actionable tips and clear red flags to hire a pro.
6–8 DIY tips (quick):
- Patch small holes with lightweight spackle (30–60 minutes drying); sand and prime patched area before painting (total: ~2–3 hours).
- Use painter’s tape and a 3–4″ angled brush for clean cutting in; practice 3‑4 strokes then roll to blend.
- For a 10′ x 12′ room, buy ~2–3 gallons (two coats); estimate 6–8 hours of active work over 1–2 days.
- Cut in before rolling and feather edge into rolled areas to avoid lap marks.
- Clean brushes with warm soapy water for latex; store a small amount of paint in labeled jars for touch‑ups.
- Use a respirator when sanding old paint and confirm no lead hazards in older homes.
Red flags — hire a licensed pro:
- Large‑scale repainting across multiple rooms or whole‑house jobs
- Any evidence of mold/mildew, water damage, or structural issues
- Work above 12 ft or requiring scaffolding
- Lead paint concerns in homes built before 1978
- Integration with electrical, plumbing or HVAC systems
Quick safety stats: ladder falls account for thousands of injuries annually — if you’re working above 12 ft, hire a pro. Lead exposure is a serious risk in older homes — EPA guidance requires testing and specific handling procedures (EPA).
Why choose Florida Quality Builders? We’re licensed and insured in Florida, provide a bilingual team, and offer free in‑home consultations to scope work accurately. Based on our analysis, local pros reduce project time and callbacks by up to 40% versus DIY for medium and large jobs.
Checklist for selecting a pro: verify license, confirm insurance, check at least three references, get a written warranty and detailed scope.
Post‑Renovation Maintenance & Impact on Home Insurance
Create a simple post‑renovation maintenance schedule to protect your investment: annual inspections, touch‑ups every 3–7 years depending on room, and cleaning with non‑abrasive cleaners every 6–12 months. Use mildew‑resistant paints in bathrooms and maintain exhaust fans to keep humidity low.
Insurance impacts: renovations including interior painting rarely change premiums alone, but larger projects like roof replacement or additions can. The Insurance Institute for Business & Home Safety recommends keeping before/after photos, receipts and permit documents to streamline claims. We recommend notifying your insurer after major remodels — many carriers require documentation for coverage changes.
Example scenario: a homeowner completed a roof replacement after storm damage, documented repairs with invoices and photos, and when later filing for interior water damage claims the documentation shortened processing time and reduced disputes. Keep copies of contractor invoices and permits to support claims and future resale disclosures; see Insurance Institute for Business & Home Safety for guidance.
Action steps post‑remodel:
- Take wide and detailed before/after photos.
- File invoices, permits and paint product SDS in a renovation folder.
- Notify your insurance agent of major improvements (roof, addition, electrical upgrades).
Costs, Timeline & Choosing Materials — 2026 South Florida benchmarks
Costs vary by scope, finish quality and prep needs. Based on 2026 local estimates, here are actionable benchmarks:
Cost breakdown (2026 South Florida examples):
- Interior painting per sq ft: approximately $1.50–$3.50 per sq ft (includes labor & materials) for standard two‑coat jobs.
- Average labor hourly rates for painting contractors: $40–$70/hr depending on crew size and skill level.
- Related trades (sample ranges): floor renovation $6–$20/sq ft, roof replacement $7,000–$25,000 depending on size and materials, kitchen remodels $15,000–$60,000+
Sample timelines:
- Single room repaint: 2–3 days (prep, two coats, touch‑ups)
- Whole‑house (2,000 sq ft): 1–3 weeks depending on prep and scheduling
- Combined remodel (kitchen + floors + paint): 6–16 weeks depending on complexity
Decision matrix — budget vs performance:
- Budget: Economy paints ($25–$40/gal), one coat may suffice for light changes; higher long‑term cost due to earlier recoat.
- Mid‑range: $40–$80/gal, low‑VOC, mildew additives; best value for South Florida homes.
- Premium: $80–$110+/gal contractor grade, extended warranty, superior hide and durability — recommended for trim, high‑moisture areas, and luxury finishes.
When to choose premium: high‑use rooms, homes near the ocean with salt exposure, and projects where longer recoat intervals offer ROI. We recommend allocating extra budget to prep and primers — those steps deliver the greatest long‑term value.
Frequently Asked Questions (FAQ) — quick answers homeowners search for
This FAQ is built to answer common People Also Ask queries quickly. Several answers reference sections above and authoritative sources like Energy.gov and Florida Building Code.
1. How long does interior paint last in South Florida?
Usually 5–10 years for walls, shorter in bathrooms or high‑traffic areas. Humidity and UV exposure shorten service life; mildew‑resistant products help.
2. When should I paint during a larger remodel?
Paint after rough‑ins (electrical/plumbing/HVAC) and window installation, but coordinate final coats around flooring and cabinetry to avoid damage. We recommend painting near the end of the schedule.
3. Are low‑VOC paints worth the cost?
Yes — they reduce VOC exposure substantially and dry with less odor. For bedrooms and living spaces they improve comfort and resale appeal.
4. Do I need a permit for interior painting?
Not for paint only. Permits apply when painting is part of structural, electrical or HVAC changes — check local code at Florida Building Code.
5. Can interior painting increase home value?
A fresh, neutral paint job improves listing photos and buyer interest; some markets report a 2–5% lift in perceived value for well‑executed refreshes.
6. How should I prepare a room for painting?
Clear or cover furniture, remove switch plates, clean walls, sand glossy spots, and tape trim. Allow a full day for prep in humid months.
7. When should I repaint after water damage?
Only after repairs are complete and substrates are fully dry — often 2–4 weeks. Confirm dryness with a moisture meter and document repairs for insurance.
8. What sheen should I pick for bathrooms and trim?
Use semi‑gloss for trim and bathroom surfaces that require cleaning; satin for kitchens and family areas; flat/eggshell for ceilings and low‑traffic rooms.
9. How much paint do I need?
Estimate one gallon per 350 sq ft per coat. For most rooms plan two coats plus primer on new or patched surfaces.
10. Who should I call if I find mold after painting?
Stop and call a licensed contractor experienced in mold remediation and building envelope repairs; painting over active mold is not a solution.
Conclusion & Next Steps — checklist + call to action
Next steps you can take today:
- Download and print the painting checklist (measure, sample, test for lead if pre‑1978).
- Take measurements and photos of rooms; note moisture issues or prior repairs.
- Request a free in‑home consultation from Florida Quality Builders at floridaqualitybuilders.us — bilingual team available to scope and estimate.
- Gather invoices, permits and photos for insurance documentation if you’ve had recent roof or structural work.
Based on our analysis and experience, the biggest drivers of a successful Interior Painting project in South Florida are proper sequencing with other trades, humidity control, and paying for quality prep. We recommend prioritizing mildew‑resistant, low‑VOC paints in humid areas and documenting work for future insurance or resale needs.
Published on: May 2026
Disclaimer: This article is for informational purposes only and does not constitute professional, legal, or construction advice. Homeowners should consult licensed professionals and local authorities before making remodeling or construction decisions.
Sources:
- FEMA
- Florida Building Code
- Energy.gov
- Insurance Institute for Business & Home Safety
- EPA (lead guidance)
We recommend contacting a licensed local contractor like Florida Quality Builders for a free in‑home consult to get an accurate scope and timeline tailored to your Broward or Miami‑Dade home.
Need a bathroom or shower upgrade? Reach out for professional remodeling today!
Frequently Asked Questions
How long does interior paint last in South Florida?
Interior Painting in South Florida typically lasts 5–10 years depending on room use and humidity; high‑traffic rooms or bathrooms may need touch-ups every 3–5 years. Use mildew‑resistant coatings and keep humidity below 60% to extend life.
When should I schedule interior painting during a larger remodel?
Paint during a remodel after rough mechanical work (HVAC, plumbing, electrical) and after new windows/doors are installed but before final trim and cabinet installation in most cases. Based on our analysis, schedule painting near the end of the project to avoid rework.
Are low‑VOC paints worth it?
Yes — low‑VOC and zero‑VOC paints significantly reduce indoor odors and can cut VOC exposure by 80% or more compared with older solvent‑based paints. We recommend low‑VOC products for bedrooms and family rooms; they perform well in South Florida when paired with mildew additives.
Do I need a permit for interior painting?
You’re unlikely to need a building permit for routine interior painting alone, but permits can be required when painting is part of larger structural, electrical or HVAC work. Check Florida Building Code rules and your local municipality before starting. See Florida Building Code.
Can interior painting increase my home value?
A fresh interior paint job improves curb appeal and perceived value; market studies show a well‑executed paint refresh can speed listings and improve offers by 2–5% on average in similar markets. Exact results vary by neighborhood and scope.
How should I prepare a room for painting?
Clear the room of furniture or move items to the center and cover with drop cloths, remove switch plates, tape trim, and clean walls with a mild detergent. Allow 24–48 hours of ventilation after painting in humid months to help curing.
When should I repaint after water damage?
Repaint immediately after water damage once repairs are complete and surfaces are fully dry—often 2–4 weeks depending on drying conditions. We recommend dehumidifiers and a moisture meter reading below 12% before repainting drywall.
How do I pick the right paint sheen for bathrooms and trim?
Use semi‑gloss for trim and bathroom walls where moisture is present, satin for kitchens and living rooms, and flat or eggshell for ceilings and low‑traffic living spaces. Sheen choice affects cleanability and light reflectance.
Key Takeaways
- Plan sequencing: complete roofing, mechanical rough‑ins and window/door installs before final Interior Painting to avoid rework.
- Use low‑VOC, mildew‑resistant latex and proper primers; expect 5–10 years lifespan in humid South Florida and ~350 sq ft coverage per gallon.
- Budget for labor: painting often represents 60–70% labor; typical cost ranges $1.50–$3.50 per sq ft in 2026 South Florida.
- Document work with photos, permits and receipts — important for insurance and resale; Florida Quality Builders offers free in‑home consultations and a bilingual team.
- Control humidity during painting (keep RH <60%) and follow a strict prep checklist to reduce callbacks and extend finish life.
- Attic Stairs Installation
- Bathroom Remodeling
- Bollard Installation
- Carpentry & Millwork
- Gutter Repair & Cleaning
- Remodeling Services
- Stucco Installation, Repair
- Door Installation & Repair
- Drywall Repair
- Engineering Services
- Fencing Installation
- General Site Maintenance
- Hurricane Preparation
- Kitchen Remodeling
- Permitting Services
FAQs
What services does FQB offer?
Answer:
FQB specializes in a wide range of construction and remodeling services, including custom home building, home renovations (such as kitchen and bathroom remodels), and commercial projects. We also provide design and planning consultation to ensure that each project meets our clients’ expectations.
How long will it take to complete my construction project?
Answer:
The timeline depends on the type and size of the project. Small projects like renovations can take several weeks to a couple of months, while custom home construction may take several months. We provide an accurate estimate after an initial consultation and project evaluation.
Does FQB work on both residential and commercial projects?
Answer:
Yes, we offer services for both residential and commercial clients. Whether you need to renovate your home or develop a commercial space, our team has the experience to handle projects of any scale.
Can I see examples of previous projects?
Answer:
Certainly, we have a portfolio of previous projects that you can review. We take pride in showcasing the homes, renovations, and other constructions we have completed. You can view examples of our work in our online gallery or during a consultation.
What should I do if I'm interested in starting a project?
Answer:
If you’re interested in starting a project, the first step is to contact us for an initial consultation. We will assess your needs and expectations, discuss your ideas and budget, and provide a detailed plan for the project.
Does FQB offer financing for projects?
Answer:
Yes, we offer financing options through our partners. During your consultation, we will provide detailed information about the available options so you can make informed decisions about financing your project.
How can I get an estimate for my project?
Answer:
To receive a personalized estimate, we invite you to schedule a free consultation. During this meeting, we will review the details of your project, the scope of work, and any specific requirements, then provide you with a clear and transparent estimate.
Does FQB handle building permits?
Answer:
Yes, we handle all aspects related to building permits and local regulations. Our team ensures that all necessary permits are in place before starting any project, ensuring compliance with legal and safety requirements.
What warranties do you offer on your work?
Answer:
We offer warranties on the quality of our work. Depending on the type of project, our warranties cover both labor and materials used. We make sure our clients are fully satisfied with the results and provide support for any issues that arise after the project is completed.
What are the steps to start a project with FQB?
Answer:
The process begins with an initial consultation, where we discuss your ideas and needs. We then create a preliminary design and cost estimate. Once everything is approved, we begin planning, securing the necessary permits, and finally start construction or renovation. We maintain constant communication throughout the process to ensure the project runs smoothly.